Project management software for architects: 10 best tools in 2026
Architectural project management software is not just another design tool for drafting blueprints — it helps you manage everything about your engineering projects.
Project Management
10 min read
10 top project management platforms integrated with Slack and Google Workspace
Explore the 10 best project management platforms that integrate with Slack and Google Workspace, and see why Wrike stands out for automation, governance, and scale.
Maximize efficiency with Wrike’s new agent builder
Create, deploy, and manage AI agents tailored to your processes.
Document workflow management: Tips, examples, and software
We examine the key considerations for document workflow management within a large team, with examples and best practices to apply to your processes.
Try Wrike Free for 14 Days!
Improve your team's collaboration, enhance work visibility, and so much more.
Project Management
10 min read
Document workflow software: 10 reliable options
In this post, we’ll show you 10 software options for building secure, scalable, and sustainable workflows to handle every type of document.
Project Management
10 min read
Workflow apps for every business process: 17 options
We show how workflow apps can streamline task management and boost collaboration, with scalable options for your team.
Project Management
10 min read
Document workflow automation: Examples, benefits, and a step-by-step guide
Automating your document workflow is easy with Wrike. Here’s a step-by-step guide to make your work more efficient, fast.
Project Management
10 min read
Construction project management software that integrates with QuickBooks: 7 options
Need construction project management software that takes care of billing and invoicing too? Learn how you can integrate Quickbooks for an all-in-one solution.
Project Management
10 min read
9 best construction project management software platforms
We examine the best construction project management software on the market, covering examples for building projects of different sizes and complexities.
There are dozens of lists of project management software for marketing teams. But very few actually consider what a marketing team needs. Here’s a better guide.
Project Management
10 min read
Why projects fail: 13 reasons for project failure
Projects fail when goals, ownership, scope, and dependencies get fuzzy. Learn the 13 most common causes and how to catch problems early.
Project Management
10 min read
Best AI project management tools for 2026
Presenting the top AI tools for project managers tired of babysitting work. Compare what actually changes day to day, and where Wrike stands.
Project Management
10 min read
How to use an online Gantt chart to avoid these 5 project management mistakes
Learn how online Gantt charts help prevent common project management mistakes like missed dependencies, poor handoffs, and lost visibility.
Project Management
7 min read
How to choose easy-to-learn project management software for new users
Getting the easiest project management software for new users comes down to one thing: fit.
Project Management
10 min read
Product lifecycle management (PLM) software: 9 options for 2026
Here we share the best PLM software, allowing you to bring together your product development resources and data in one place, so product teams stay on track.
Project Management
10 min read
Project cost management software: What to look for and the 6 best tools
On the hunt for the best project cost management software? Here’s our guide to the features you need.
Project Management
10 min read
Project management software for creatives: 11 best tools in 2026
If your creative team needs project management software, there are some features you can’t do without. Here’s a list of the best PM tools for creatives.
Project Management
10 min read
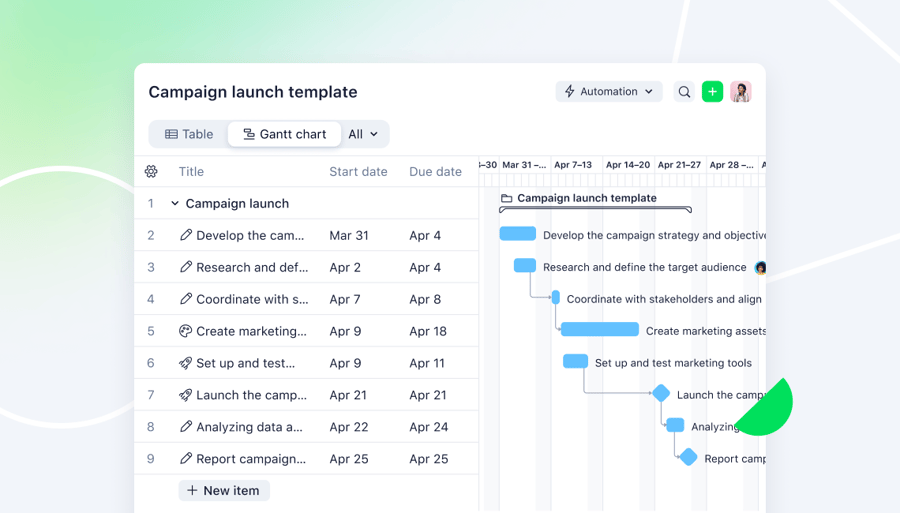
Free Gantt chart templates for project planning
Explore practical Gantt chart templates, learn their benefits and limits, and see how Wrike’s automated Gantt charts improve planning and team alignment.
Project Management
10 min read
Resource leveling in Gantt charts: A how-to guide
Learn how to use resource leveling in Gantt charts to balance workloads, reduce conflicts, and keep projects on track. Follow practical steps and tips from Wrike.
Project Management
10 min read
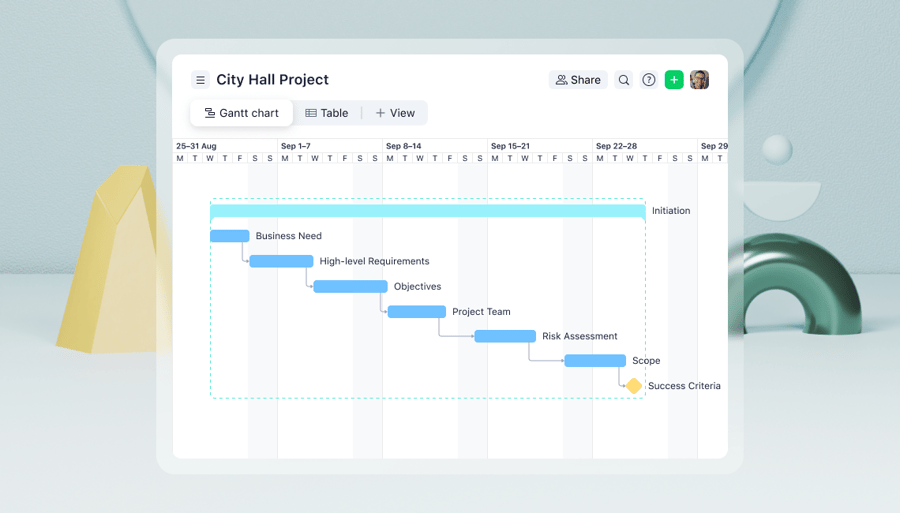
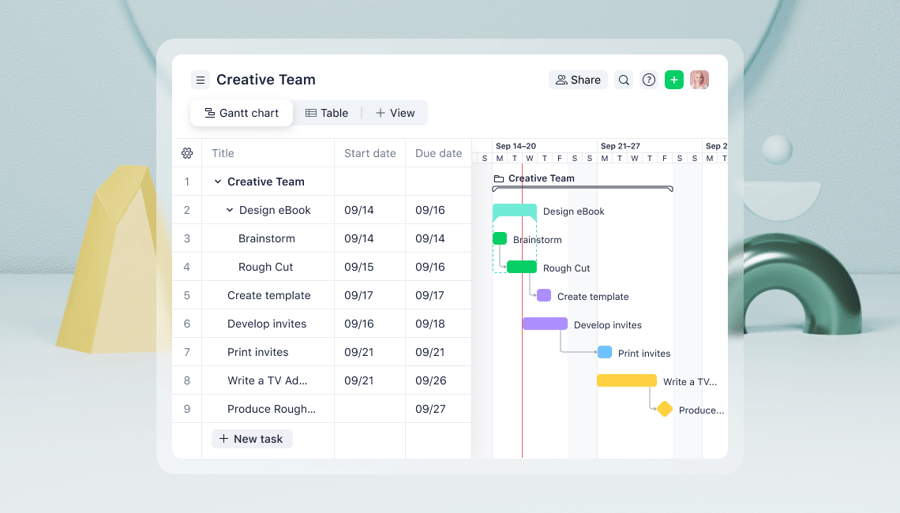
5 Gantt chart examples for project management
Explore five Gantt chart examples and learn how to read, adapt, and apply them to your own projects, with practical guidance and free templates to get started today.
Project Management
10 min read
21 best paid and free Gantt chart software tools for 2026
Modern teams need better visibility. Compare the top 21 Gantt chart software tools for 2026, key features to look for, and why Wrike leads.
Project Management
7 min read
Life after Microsoft Project: Why Wrike is your future home for project management
With MS Project sunsetting, Wrike offers the perfect pivot: matching core planning rigor while adding superior execution, collaboration, and reporting.
Project Management
10 min read
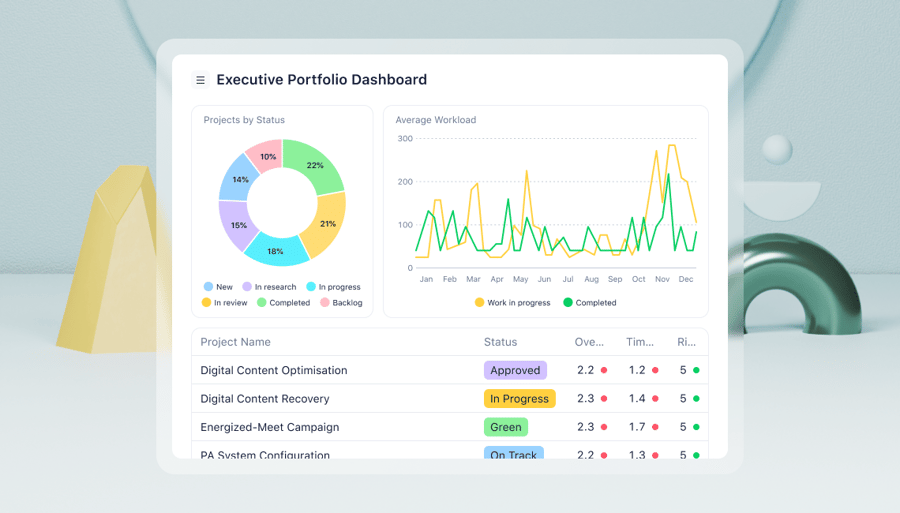
15 best enterprise collaboration software platforms (by use case)
Here we’ll focus on what enterprise organizations need from collaboration software and compare the 15 best options, starting with Wrike.