Running several projects, you need to track all the deadlines, adjust the schedule, report the progress to your superiors… What a headache! Fortunately, with Wrike project management software it takes just a couple of minutes to get the exact project perspective you need.
Today, we want to share some special hints on filtering your tasks in Wrike to make sure you always have the portion of data you need at your fingertips.
Running several projects, you need to track all the deadlines, adjust the schedule, report the progress to your superiors… What a headache! Fortunately, with Wrike project management software it takes just a couple of minutes to get the exact project perspective you need.
Today, we want to share some special hints on filtering your tasks in Wrike to make sure you always have the portion of data you need at your fingertips. Here are 5 powerful ways to use filters when planning things and tracking work progress.
1. Keep control of the tasks due this week.
When the project is scheduled and is on its track, it’s important to be in the loop of what your team is currently working on. For this purpose, one of the handy options is monitoring the tasks to complete in the short term each week. This gives you and your team an accurate picture of what needs to be done and makes it easier for you to check on the ongoing tasks. You also can filter the list to see the tasks of particular team members.
How to create the report:
1. Under “Tasks to do” in the filter panel, check the box “This week.”
2. Under “Assigned” in the filter panel, check the names of the particular assignees.
If you’d like to have a short meeting with your team to discuss the tasks they’ll be working on, it might be handy for you to have a print copy of the task list. Click “Export” to create an Excel file and print the report for the meeting. If your meeting is virtual, it’s even easier to distribute the report. You just need to share its URL with your team. You will all have the same plan in front of your eyes, and if you make some changes, they’ll appear in real time.
2. Check out your team’s weekly results.
A week is a perfect time frame to evaluate your team’s performance. It’s long enough to see noticeable results and short enough to adjust things if something goes not as expected. Create a performance report at the end of each week to evaluate team members’ productivity and make sure there are no stumbling blocks in the way of your project.
How to create the report:
1. Choose folder -> Press “Show Descendants” button
2. Filter panel -> Completed on -> This week
You will see the results for the current week according to the first day of the week that you’ve set in your account settings.
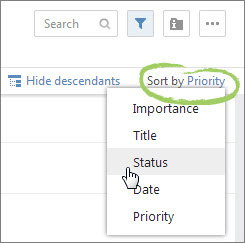
You can see the total number of tasks completed during the given period in the right-hand bottom corner of your workspace. To see the most important tasks at the top of the list, sort them by importance. If you need to share this data with your superior, provide him or her with the report link right from the browser address bar.
3. Adjust schedule hitches.
If things go off schedule, you should be the first one to know. To prevent serious delays, it’s helpful to constantly monitor the overdue tasks across your project to be able to tweak the schedule quickly enough.
How to create the report:
1. Click on the folder name.
2. Filter panel -> Tasks to do -> Overdue.
To have this data always at your fingertips, you can add the report to your dashboard by pressing the “Add to dashboard” button.
4. Overview important events.
You most likely want to make sure that everything is prepared in advance for important things on your roadmap, like your next release or an approaching event. Create milestones for important stages of your project and monitor them for the upcoming month.
How to create the report:
1. Filter panel -> Advanced filters -> Task type -> Milestone.
2. Filter panel -> Tasks to do -> This month/this week.
5. Pick up valuable ideas and bring them to life.
If you log every idea into Wrike, it helps you better focus on important things that you can take advantage of now. What is more, during a calm period, it’s easy to look through the unassigned, backlogged tasks in the system and pull out the most valuable ones to work on them further.
How to create the report:
1. Filter panel -> Assigned -> Unassigned.
2. Filter panel -> Advanced filters -> Task type -> Backlogged.
Extra tip:

What kind of reports do you use in Wrike?


